

Charcuterie boards look impressive, but they are much easier to assemble than most people think. Many beginners assume they need special skills, expensive ingredients, or professional training. The truth is simple. A great board comes down to smart placement, balanced ingredients, and a clear assembly order. When you follow a basic structure, you can create a board that looks polished using everyday grocery items.
This listicle focuses on foolproof ideas that work for real homes and real budgets. Each board concept emphasizes no-cook assembly, flexible ingredient swaps, and quick prep. You can build most of these boards in about 15 to 20 minutes. That makes them perfect for parties, holidays, or casual nights when you want something that feels special without spending hours in the kitchen.
By the end, you will have a repeatable system you can use again and again. You will know where to start, how to layer ingredients, and how to finish your board so it feels abundant and inviting.
1. Anchor Your Board Like a Pro
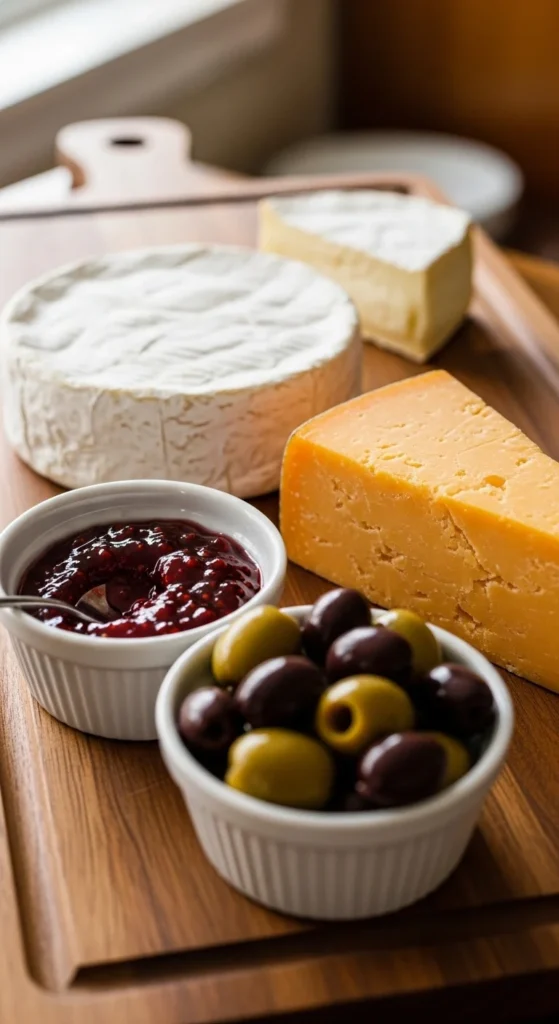
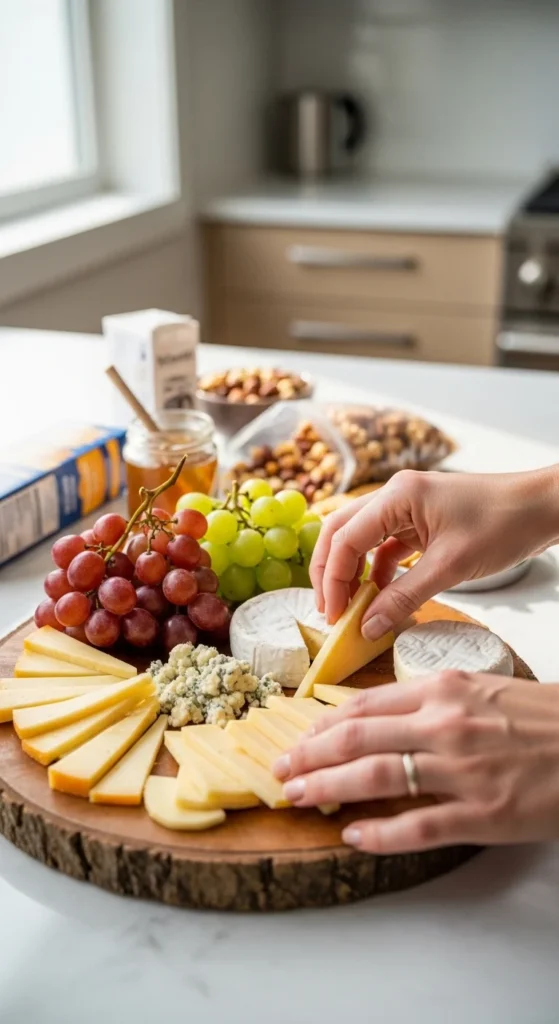
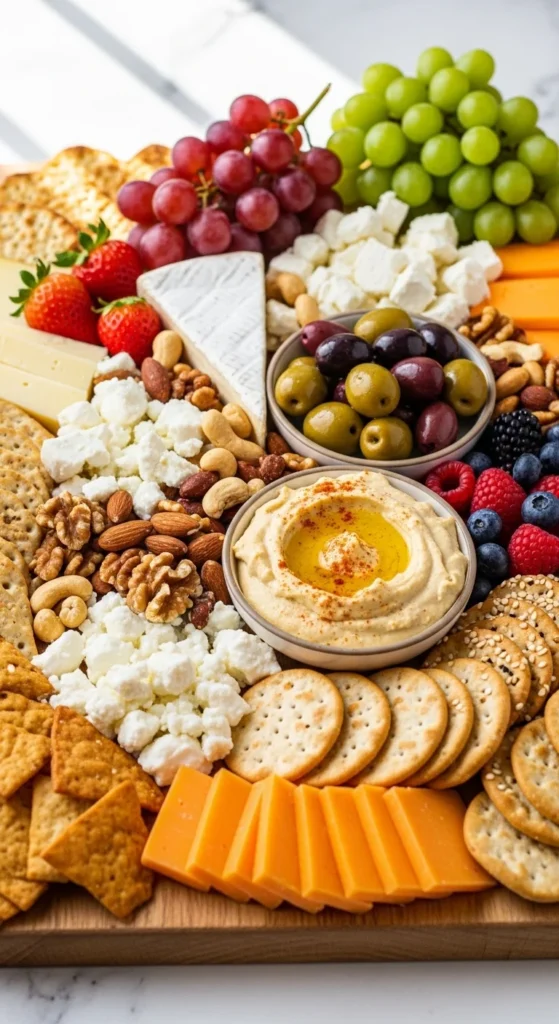
Anchoring your board creates the structure that everything else builds on. When beginners place small items first, boards often look scattered and uneven. Starting with larger elements gives you visual balance and helps prevent overcrowding later. Cheese and small bowls naturally act as visual anchors because they hold weight and shape.
Begin by placing two or three cheeses across the board with space between each one. Add any small bowls of olives, jam, or honey next. These pieces should feel evenly spaced, not clustered in one corner. Once these anchors are set, you will notice natural zones forming where other ingredients can fit.
For serving, cut part of each cheese into slices or wedges while leaving some whole for visual appeal. Add small spreaders or cheese knives beside soft cheeses. This makes the board easy to use and keeps everything looking intentional.
2. The Beginner Cheese Trio That Always Works
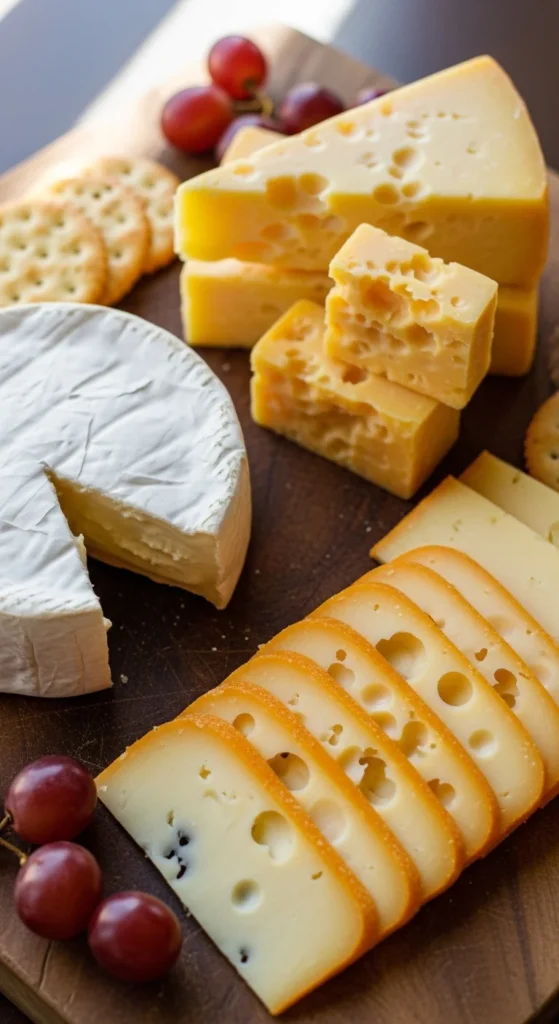
Choosing the right cheese mix removes guesswork. A simple trio gives you balance without overwhelming options. Using one soft, one hard, and one semi-hard cheese creates contrast in both texture and flavor, which keeps the board interesting for everyone.
A reliable combination is brie for creaminess, cheddar for sharpness, and gouda for mild, sliceable appeal. Arrange each cheese in its own area so guests can easily see the options. Pre-slice some pieces so people do not feel awkward being the first to cut.
For serving, plan about two to three ounces of cheese per person if the board is an appetizer. If the board is meant to replace a meal, increase to around five ounces per person. Pair cheeses with nearby crackers or bread so guests naturally build bites.
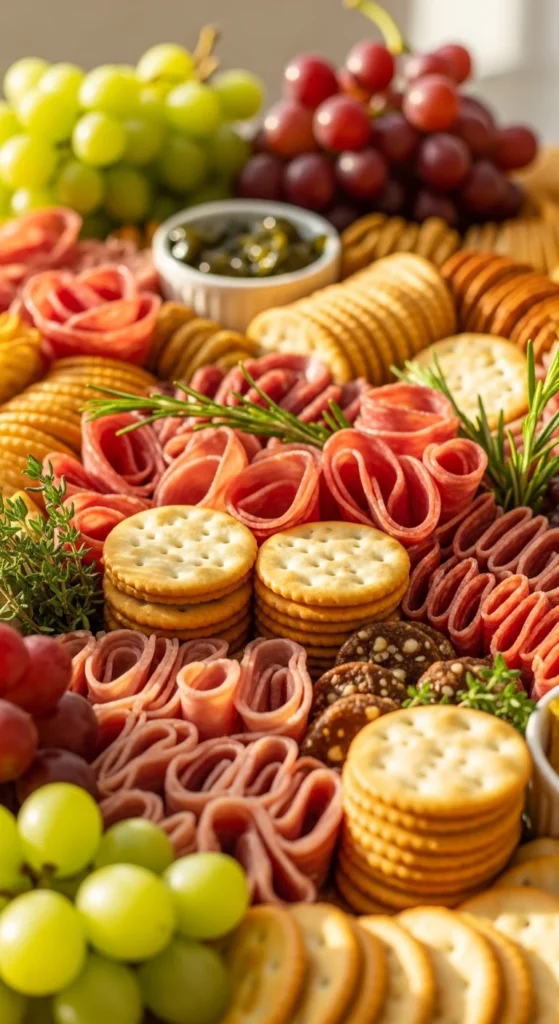
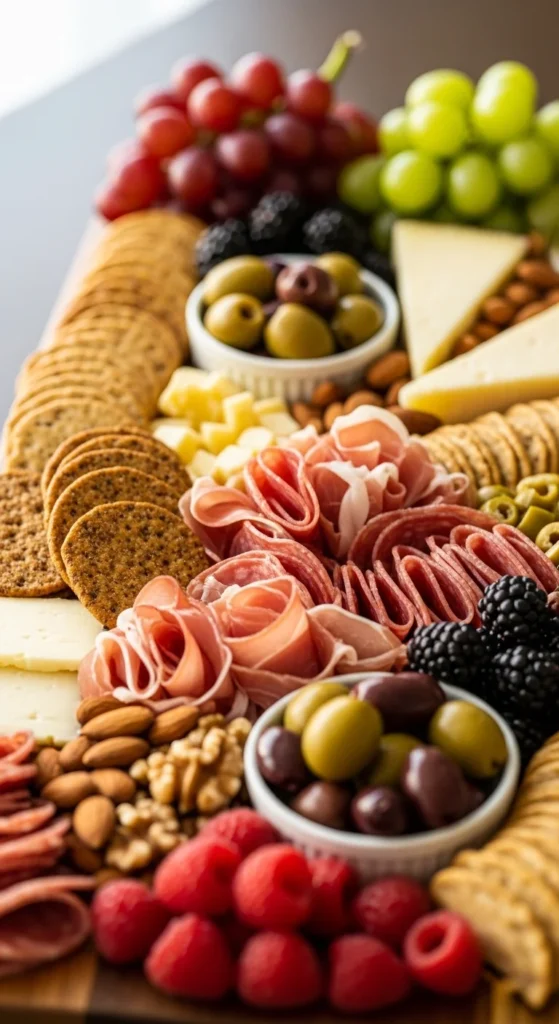
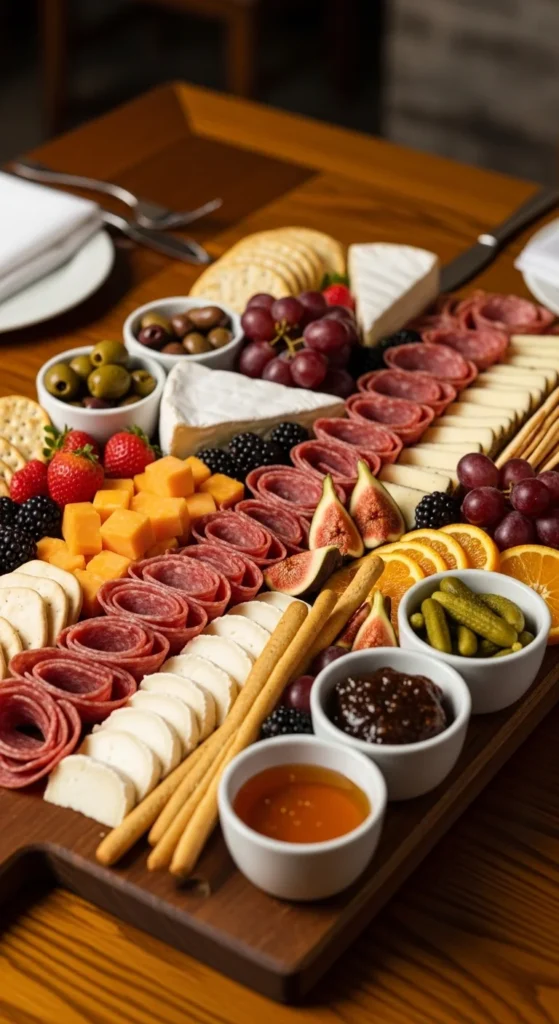
3. Fold the Meats for Instant Texture
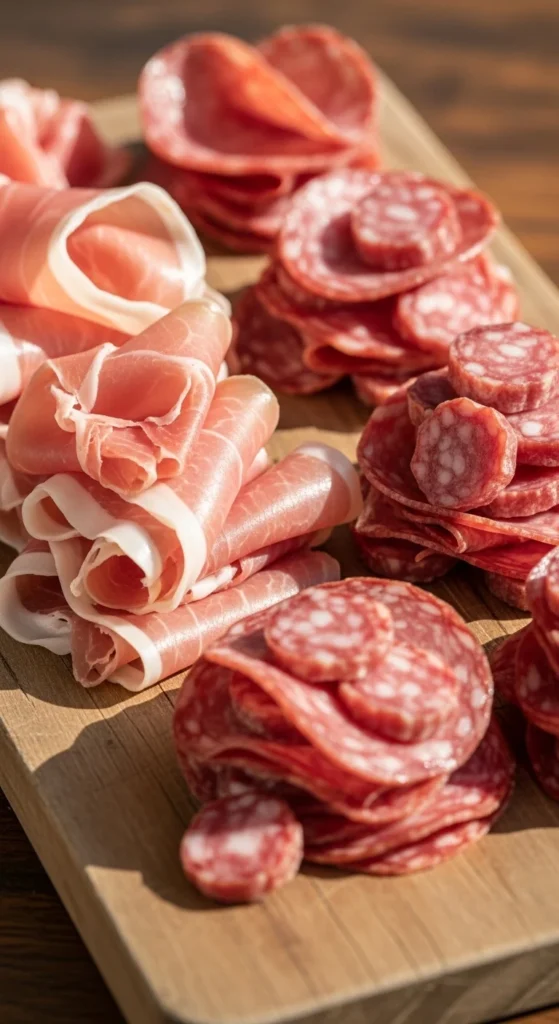
Flat meat slices tend to look dull and take up too much space. Folding creates height, movement, and visual interest without adding extra ingredients. It also makes pieces easier to grab.
Roll prosciutto into loose spirals. Cut salami slices in half or quarters and stack them into small ruffles. Arrange the folded meats near the cheeses, letting them curve naturally around the anchors.
For serving, keep meats slightly separated so guests can pick pieces without disturbing the whole layout. If the board will sit out for a while, place meats away from direct heat or sunlight to maintain texture.
4. Follow the Cheese > Meat > Fillers Order
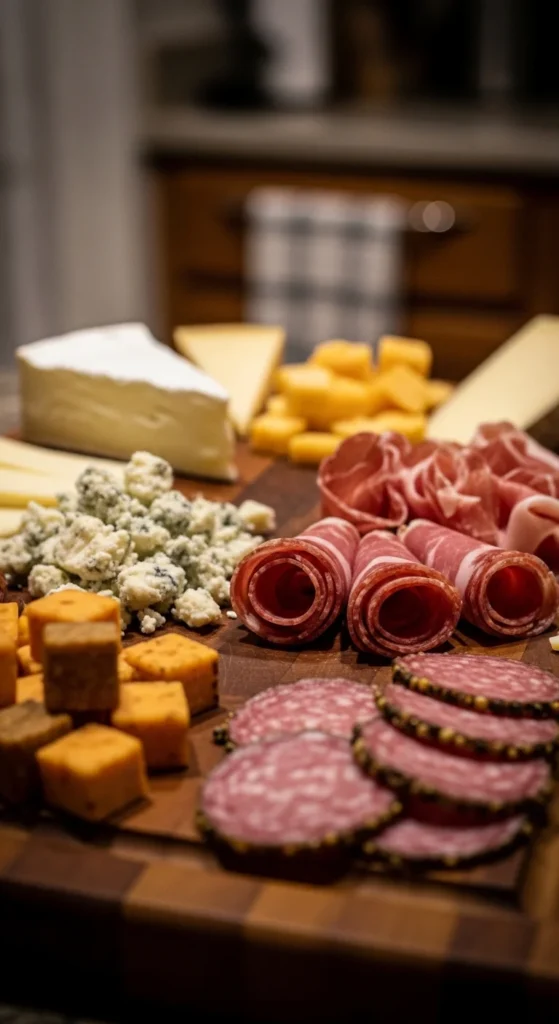
Assembly order makes a huge difference. When you place cheese first, then meat, then fillers, the board comes together faster and looks more organized. This approach removes constant rearranging.
Start with cheeses and bowls. Add folded meats next, positioning them around the anchors. Once those are set, you can clearly see where smaller items should go.
For serving, use fillers such as grapes, berries, nuts, and crackers to finish the board. These items slide easily into gaps and complete the look without effort.
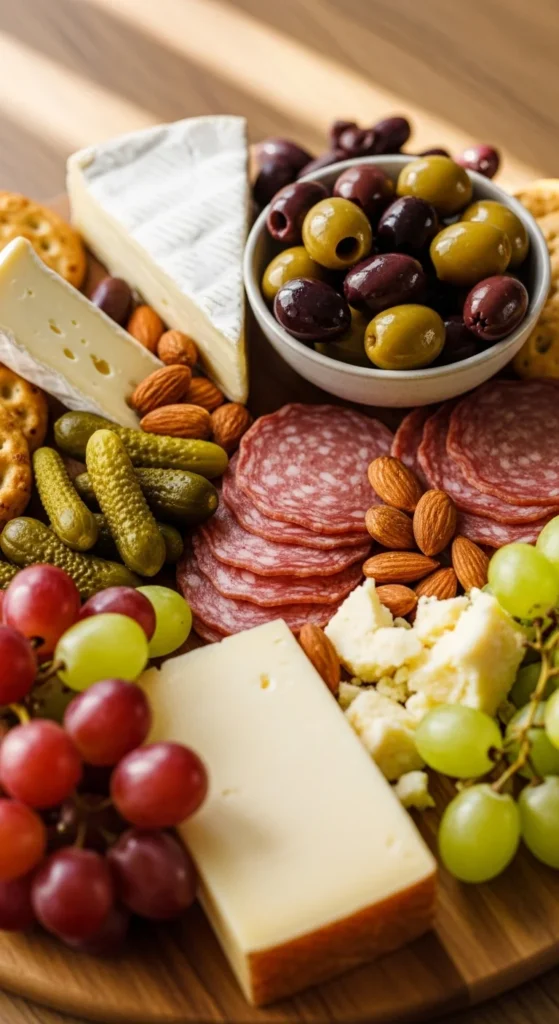
5. Master the No-Bare-Spots Rule

Empty spaces make a board look unfinished. Filling gaps creates a sense of abundance and polish. This step alone can turn a simple board into something that looks styled.
After placing cheeses and meats, scan the board for open areas. Tuck grapes into corners, sprinkle almonds into small clusters, and add berries where color is needed. Focus on small piles rather than spreading items thin.
For serving, keep fillers close to complementary items. Place fruit near cheese and nuts near meats. This helps guests naturally combine flavors and keeps the board practical as well as attractive.
6. Boards Ready Before Guests Arrive

One of the biggest advantages of beginner charcuterie boards is speed. These boards are designed for busy hosts who want something attractive without spending hours in the kitchen. When you know your board can be assembled in about 15 to 20 minutes, entertaining feels manageable instead of stressful.
Start by laying out all ingredients on the counter before assembling. Open packages, wash fruit, and place small bowls within reach. Once everything is ready, follow a simple flow: cheese first, meats second, fillers last. This keeps the process smooth and prevents backtracking.
For serving, assemble the board shortly before guests arrive so crackers stay crisp and fruit looks vibrant. If needed, you can cover the board loosely with plastic wrap and refrigerate for a short time, then add crackers and herbs right before setting it out.
7. The Zero-Skill Kitchen Win
Charcuterie boards work so well for beginners because they require no cooking. There is no stove, no oven, and no complicated prep. Everything is about arranging, not preparing recipes.
Choose store-bought cheeses, cured meats, crackers, dips, and fruit. Use pre-sliced items if you prefer. Place ingredients directly onto the board or into small bowls. That is all it takes.
For serving, keep small utensils nearby such as cheese knives, toothpicks, or small spoons for spreads. This keeps hands clean and makes grazing easy for everyone.
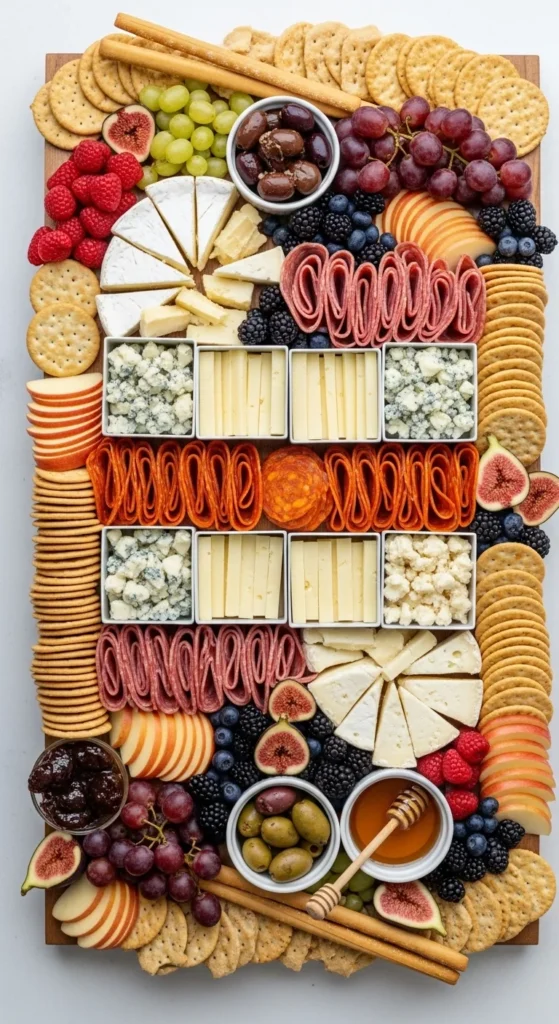
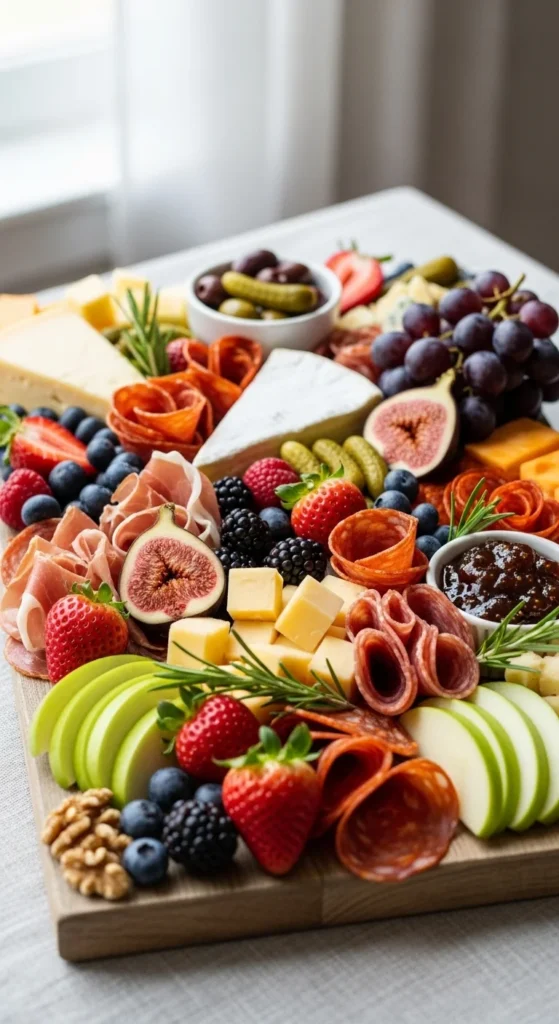
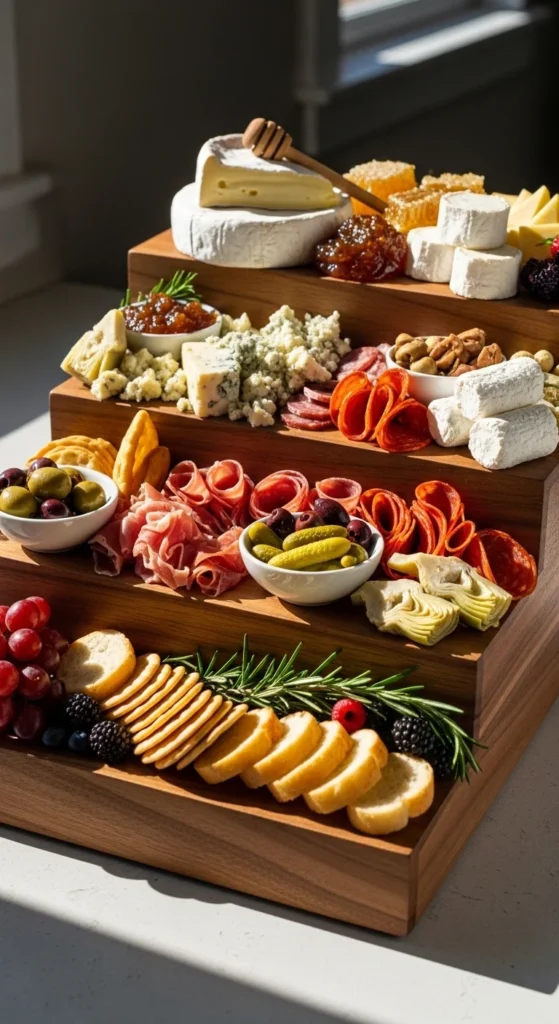
8. Secrets to That Instagram-Worthy Overflow
Full boards feel welcoming. A board that looks slightly overfilled appears more generous and appealing than one that looks sparse. This visual abundance is what gives boards that social-media-worthy style.
Layer items instead of laying everything flat. Stack crackers in small fans. Let grapes spill naturally along edges. Build gentle height with folded meats and overlapping cheese slices.
For serving, avoid packing items so tightly that guests cannot grab food easily. The goal is abundance with breathing room, not overcrowding.
9. Flavor Balance Checklist
A good board tastes as good as it looks. Balance keeps flavors interesting and prevents the board from feeling heavy or one-note.
Include something creamy, something salty, something sweet, and something crunchy. Creamy cheeses pair well with grapes or jam. Salty meats match nicely with pickles or olives. Nuts add crunch and contrast.
For serving, place complementary items near each other so guests naturally build balanced bites without thinking about it.
10. The 2–3 Ounce Per Person Cheat Sheet
Portion planning removes guesswork. Too little food feels awkward. Too much leads to waste. A simple guideline keeps things easy.
Plan about two to three ounces of cheese and meat per person for appetizer boards. For meal-style boards, increase closer to five ounces per person. Fill out the board with crackers, bread, fruit, and nuts.
For serving, if you are unsure, lean slightly higher on crackers and fruit since they are more affordable and stretch the board.
11. The One-Stop Trader Joe’s Shopping Board

Budget is a common concern for beginners. Many people assume charcuterie boards require specialty shops and expensive ingredients. In reality, one well-planned grocery trip can cover everything you need.
Trader Joe’s is a popular option because it carries affordable cheeses, cured meats, crackers, nuts, olives, and fruit in one place. You can easily build a complete board for a reasonable total by choosing store-brand items and skipping premium packaging.
For serving, focus on variety rather than quantity of expensive items. A few cheeses paired with plenty of crackers, fruit, and nuts create a generous board without overspending.
12. Gluten-Free Boards Everyone Loves
Gluten-free boards are simple to create and naturally appealing. Most charcuterie ingredients are already gluten-free, which makes inclusion easy.
Choose gluten-free crackers or rice crisps as the base. Pair them with cheeses, meats, fruit, nuts, and olives. Avoid breads unless they are clearly labeled gluten-free.
For serving, keep gluten-free crackers in a separate cluster so guests can identify them easily. If hosting mixed diets, place a small card near the crackers or simply mention it verbally.
13. Boards That Please Picky Eaters
Not every board needs bold flavors. Some gatherings call for simple, familiar foods that feel comfortable for kids and selective eaters.
Use mild cheeses like cheddar, mozzarella, or colby jack. Add sliced turkey or ham along with crackers, apple slices, and grapes. Include one or two dips such as ranch or honey mustard.
For serving, keep stronger flavors on a separate small board if needed. This way everyone finds something they enjoy without feeling overwhelmed.
14. Drink Matches for Max Flavor

Pairing drinks with charcuterie makes the experience feel more thoughtful. It does not require expert knowledge. Simple matches work well.
Red wine pairs nicely with cheddar and salami. White wine pairs well with brie and fruit. Light beers work with most meats and cheeses.
For serving, offer one wine option and one non-alcoholic option such as sparkling water or juice so everyone has a choice.
15. Waste-Not Board Strategy
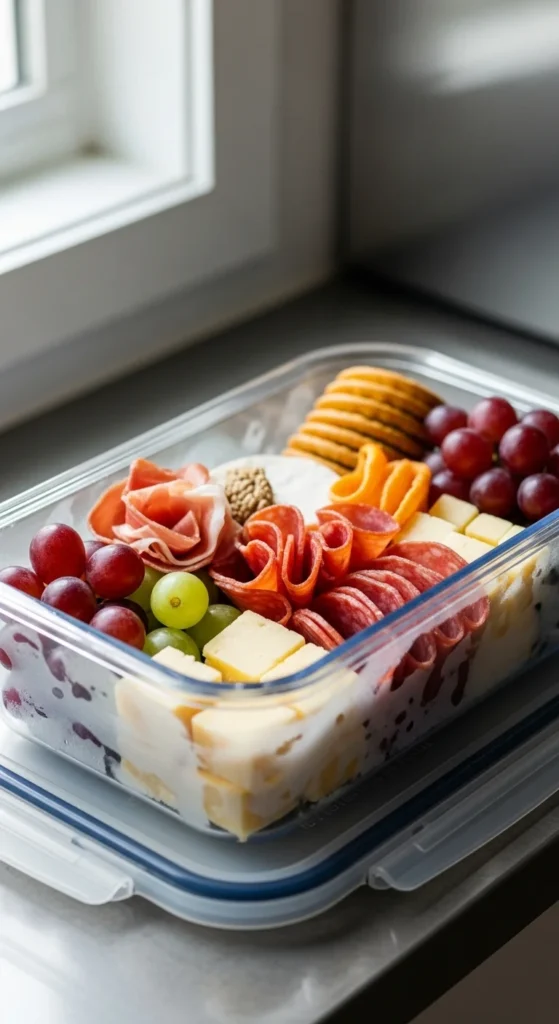
Leftovers are common after grazing boards. With a plan, nothing goes to waste.
Store cheeses and meats in airtight containers. Wrap harder cheeses in parchment before sealing. Keep crackers separate so they stay crisp.
For serving later, repurpose leftovers as snack plates, sandwich fillings, or lunchbox additions. A board can stretch into several days of easy eating.
16. Year-Round Fruit Swaps
Fruit plays a major role on beginner charcuterie boards because it adds color, sweetness, and balance. Using what is in season keeps boards affordable and easy to build. You do not need exotic fruit to create an attractive spread.
In warmer months, use strawberries, blueberries, blackberries, and grapes. In cooler months, switch to apple slices, pears, figs, or orange segments. Choose two fruits that contrast in color and texture.
For serving, wash and dry fruit well so moisture does not soften crackers. Cluster fruit in small piles around cheeses for a natural look.
17. Date Night Mini-Boards

Charcuterie boards are not only for big gatherings. Small boards work beautifully for quiet evenings and casual meals.
Use a small cutting board or plate. Choose one soft cheese, one hard cheese, one meat, one fruit, and one crunchy element. This keeps things simple while still feeling special.
For serving, place the board between two plates and add napkins and small knives. It feels intentional without extra effort.
18. Hack Fancy Shapes at Home

You do not need professional tools to add fun shapes. Simple kitchen items can create playful details that stand out.
Use cookie cutters on sliced cheese. Use a melon baller on semi-hard cheeses or fruit. Cut cucumbers or melon into bite-sized rounds.
For serving, mix shaped pieces with regular slices so the board still feels natural, not staged.
19. Healthy Plant-Based Boards
Plant-forward boards are becoming more popular because they feel lighter and flexible. They still offer variety and visual interest without relying on meats.
Use multiple cheeses, nuts, olives, roasted vegetables, fruit, and dips such as hummus or yogurt-based spreads. Add crackers and bread as the base.
For serving, group plant-based items together so guests immediately recognize the board’s focus.
20. Lazy Host: Order & Impress

Sometimes you truly do not want to assemble anything. Ordering a pre-made board is a practical option.
Many local shops and online services deliver ready-to-serve boards with balanced selections. You can transfer items to your own board if desired.
For serving, add a handful of extra grapes or crackers to make the board feel fuller and more personal.
21. Patriotic and Holiday Color Boards

Themed color boards are an easy way to make a spread feel special without changing the ingredient list too much. By focusing on color instead of complicated recipes, you can create boards that fit holidays, celebrations, or seasonal gatherings.
Choose two or three colors and build your ingredients around them. For red, white, and blue themes, use strawberries, brie, blueberries, cheddar, and crackers. For fall, use figs, grapes, apples, and darker cheeses. For winter, lean into pale cheeses, olives, and dried fruit.
For serving, arrange items in gentle color clusters rather than strict lines. This keeps the board festive while still feeling relaxed and inviting.
22. Small-Batch Hosting Boards
Not every gathering is large. Medium boards for five to six people strike a balance between abundance and simplicity.
Choose two cheeses, two meats, two fruits, one nut, and one cracker. This gives enough variety without overcrowding the board.
For serving, place the board in the center of the table and provide small plates. Guests can graze comfortably without needing multiple boards.
23. Board Shapes That Change the Look

The shape of your board changes the overall feel of the spread. Long boards feel dramatic. Round boards feel cozy. Square boards feel modern.
Use what you already own. Cutting boards, serving trays, or even large plates work well.
For serving, adjust layout to match the shape. Long boards suit flowing lines of meat. Round boards look great with circular clusters.
24. Foolproof 4-Step Board Template
Every successful beginner board follows the same simple pattern. This template removes uncertainty and builds confidence.
Step one: place cheeses and bowls. Step two: add folded meats. Step three: fill gaps with fruit, nuts, and crackers. Step four: finish with herbs or small accents.
For serving, keep this template in mind anytime you build a board. It works for every size, theme, and budget.
Conclusion
Charcuterie boards do not require special skills, expensive tools, or complicated planning. With a few dependable ingredients and a clear assembly order, anyone can build a board that looks polished and inviting. These foolproof ideas show that good structure, balanced flavors, and thoughtful spacing matter more than fancy extras.
Once you practice a few times, board building becomes second nature. You will start to recognize patterns, trust your eye, and adjust based on what you have on hand. That confidence makes hosting feel lighter and more enjoyable.
Use these ideas as your go-to reference. Mix and match concepts, swap ingredients, and build boards that fit your lifestyle. Beautiful charcuterie is within reach every time.
Leave a Reply